Prerendered Backgrounds with Blender and Godot
Terminology
- Background: The prerendered static part of the screen during gameplay.
- 3D object: “Real” object that the player can interact and fully rendered in real time (e.g. the player model, pickable items).
- Background object: Things in the prerendered background that can appear on top of 3D objects (e.g. walls, tables)
- Projection plane: Flat surface placed in 3D space that receives a rendered image to create the illusion of depth and occlusion.
Some context
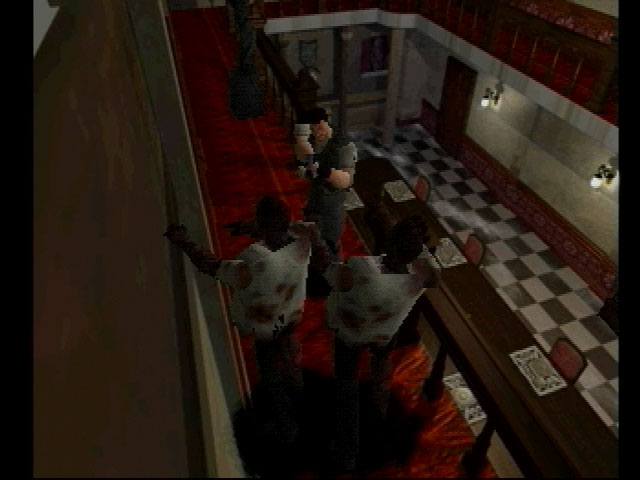
Back in the early 2000s, one of my friends brought his PS1 and a pirated copy of Resident Evil. That was my first contact with the series. My family and I were astonished on how good the game looked (all we’ve seen up to that point were some old arcade games in MAME and a knockoff NES clone). It’s common knowledge by now that the trick to make the game look that good in such a weak system was to render a 3D static scene in a computer application, like Softimage 3D or 3D Studio, put it in the game, put 3D objects on top of that and make the game camera match the one used in the 3D render. Ever since I found out, I wanted to recreate that aesthetic on my own. In this post I will share a method I found to recreate the static scenes of these old games.
The part of getting 3D objects on top of a picture is easy. My first attempt was rendering a simple room and matching the blender camera values with those of a Raylib camera (unfortunately, I no longer have any screenshots or code from that prototype.). It worked fine, but as soon as you want to add background objects in the prerender that could appear on top of the 3D objects, it gets a little bit more complicated. You need to somehow tell the engine “See this specific pixel of the background? It’s supposed to be in front of the 3D object right now, so paint it after drawing the 3d object”. In this attempt, I had two renders: the “albedo”, which is what you end up seeing in game, and the “depth map”, which is a black and white image that tells how far things are in the render. The darker the pixel, the closest it is to the camera.
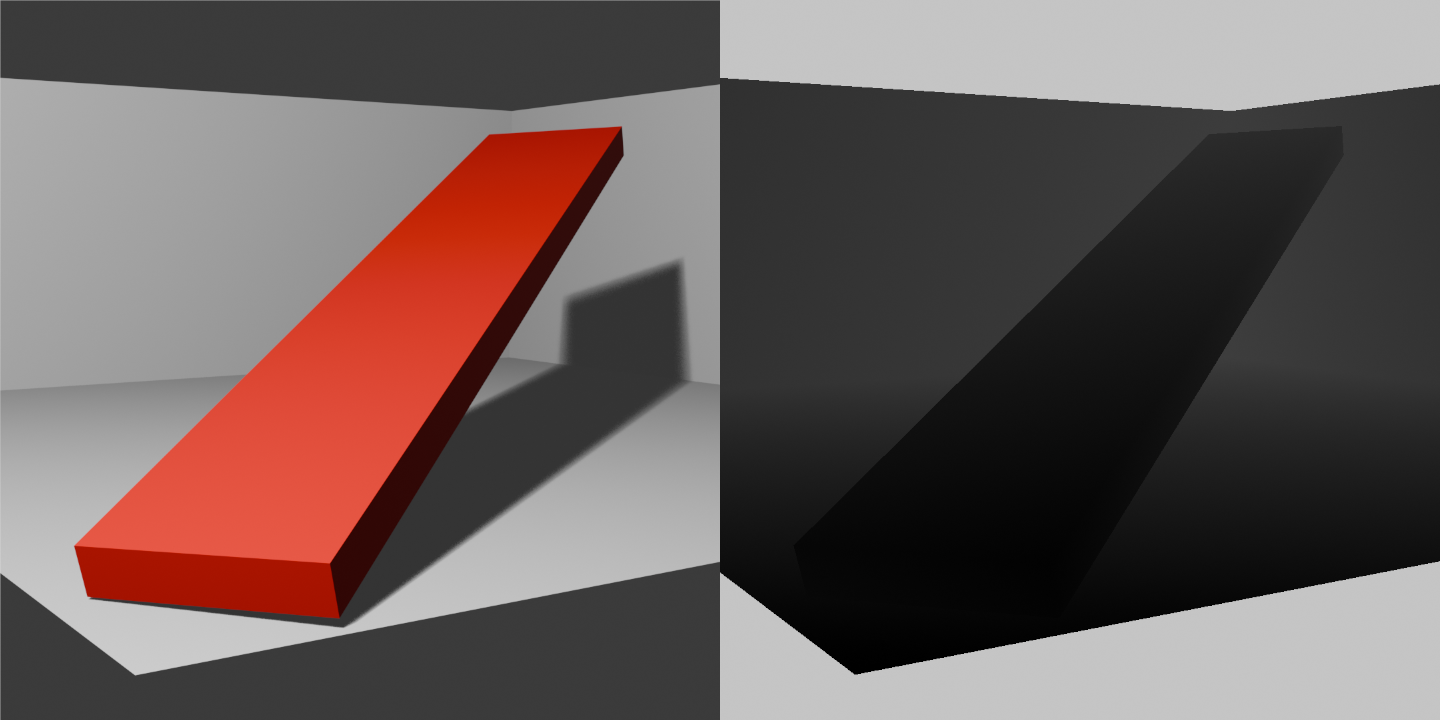
In theory, you could check the color of the depth map to determine the order the albedo pixels should be drawn. This had two problems I was never able to solve:
- It involves writing shaders. They should be perfect for this situation since they take care of pixel logic instantly in the GPU. I gave it a very long try but I can’t wrap my head around shader programming, so I gave up.
- The depth map is not that precise. After trying the shader way, I made a simple CPU logic of “if a depth pixel is darker than X, then draw it again on top of everything” just to make a proof of concept of what it would look like. It was not that good. The edges of the objects looked really noisy and it wasn’t a clear cut, because of the way blender renders the depth map. I think it’s possible to fix this in Blender, but at that point I already moved on with other methods. The animation below highlights every shade of gray of the depth map, and it’s possible to see how noisy they are.
- Even if I succeeded writing a shader, the solution is too finicky and you have to manually set variables both in Blender and the game engine to match how far or near things are, or the 3D objects will appear at the wrong depth, and you have to do this for each camera angle you want to add. You need automate the process of setting up the depth range variables to streamline the process a bit more.
I put the project on hold for a while and tried doing it again, but this time in Godot. I found a video by FinePointCGI, where he renders the image and projects it on top of every scene object and imports the complete 3D scene into Godot. While this works, this has the following problems:
- Excess of polygons. After all, the point of this is to lower resource usage.
- The projection is improper along slanted faces and will look weird around the edges. If you’re gonna do projections on planes, your best bet is to make them as perpendicular to the camera angle as possible.
My method
While this method is not as efficient as they were on old systems, it has the following benefits:
- Should run on any today’s toaster.
- I think it looks convincing (for a 90’s industry standard. It’s not UE5 with RT).
- Importing it to your game is almost trivial. I made this in Godot, but I think it’s even engine independent, as long as your engine allows importing .gltf files. I haven’t explored alternatives like UE or Unity.
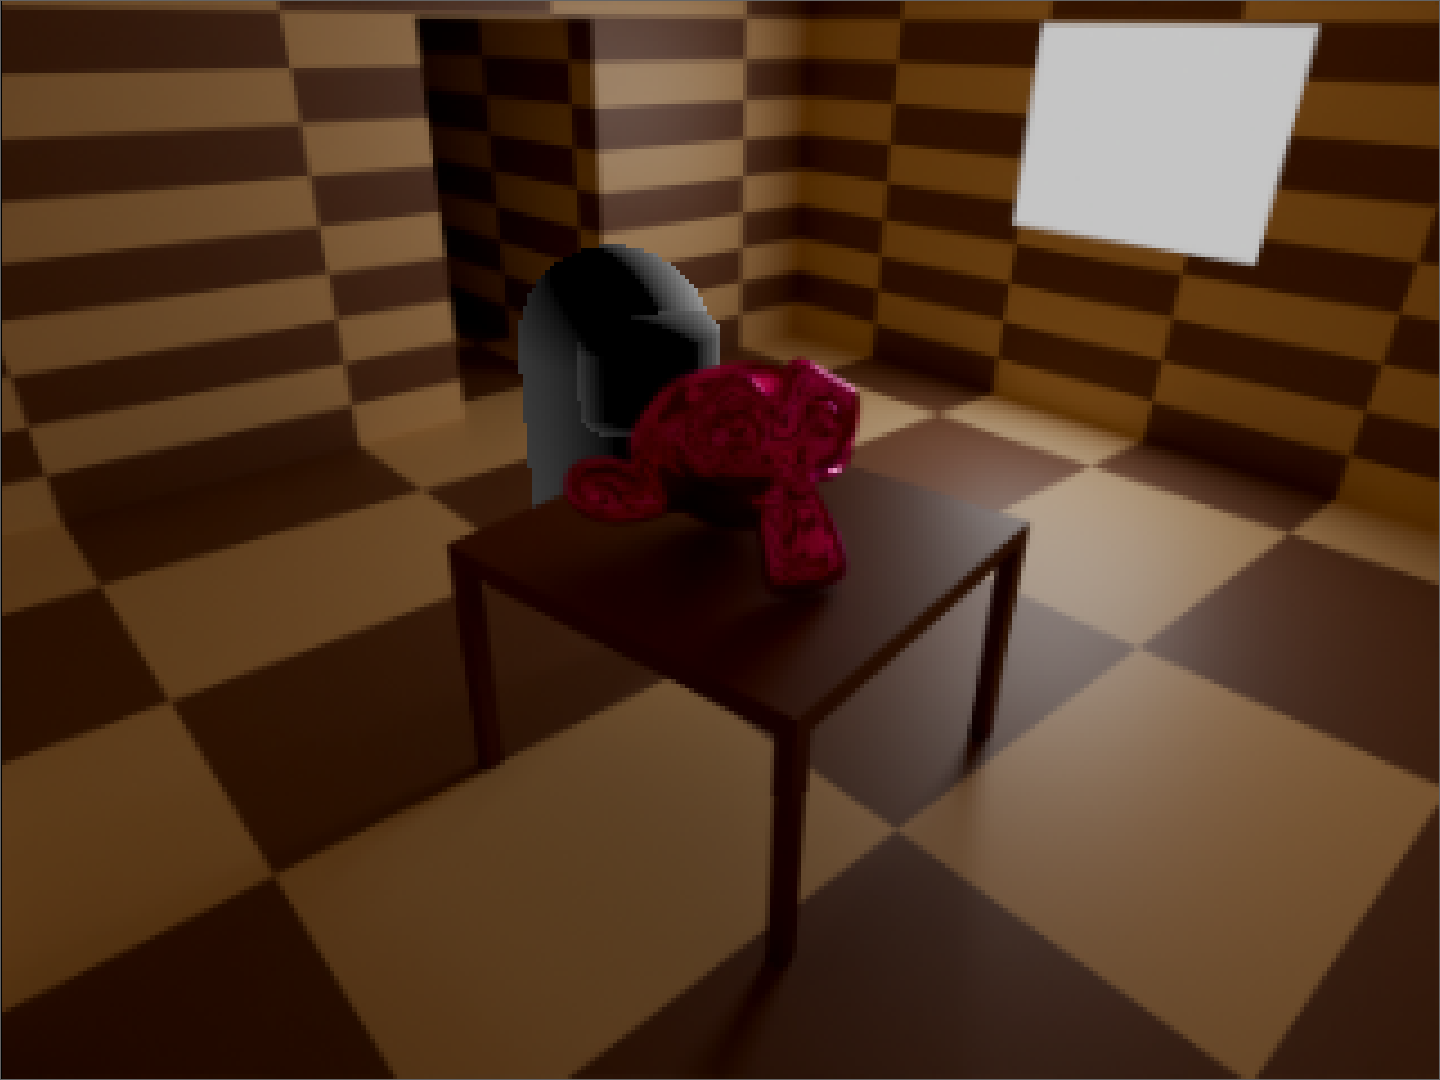
It consists of strategically placed planes and projecting parts of the background render to those. So in essence, the background is just another 3D static object perfectly aligned to give the illusion of being a more complex thing.
Modeling and rendering
First, model the complete room to be rendered in Blender and choose some camera angles. There’s not a lot of science for this, besides common 3D modeling knowledge. You’re pretty much free to do what you want at this stage.
While we are at it, render the camera views. You also need cropped renders isolating the background objects that could be drawn on top of the 3D objects to transparent images, and later will project to projection planes. I do not recommend manually cropping these in an image processor, as we can set Blender to render only the object we want while keeping lighting information. We can achieve this by making two collections: one with the objects we want to isolate, and the other with everything else (including light sources). We right click the later collection and pick “View Layer > Set Holdout”. This doesn’t exactly “hide” the objects of the second collection but will be rendered invisible while still affecting the lighting in the first collection. I recommend making this separation just for the cropped render and undoing this after rendering.
In the case there are multiple background objects overlapping, we have to make a render for each layer of objects: one with only the nearest object, another with both this object and the one behind it, and so on until all layers are rendered.
I think it’s possible to make a more automated solution using cryptomattes, as it can separate every layer in just one render, but requires compositing knowledge that I don’t have right now and this method works fine for this.
Collision data
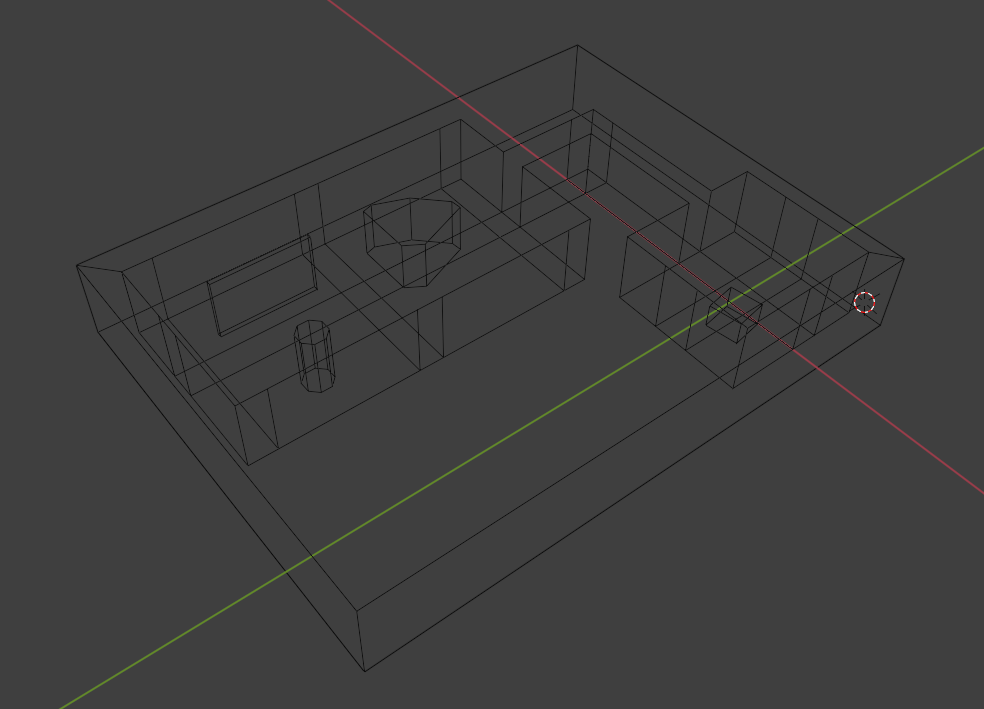
Make a low poly version of the room that will serve as collision data. What I like to do is make a giant cube surrounding the complete play area, cast the walls of the render room to it using a boolean modifier and then add additional simple meshes matching the render room objects in edit mode. This will help both for character navigation and to place the projection planes.
Projection planes
We are ready to start dealing with the cameras and their projections. For now we’ll take care about their positioning and unwrapping their UVs. We’ll worry about their material later. Please note some screenshots in this section already have their needed material applied for visual aid.
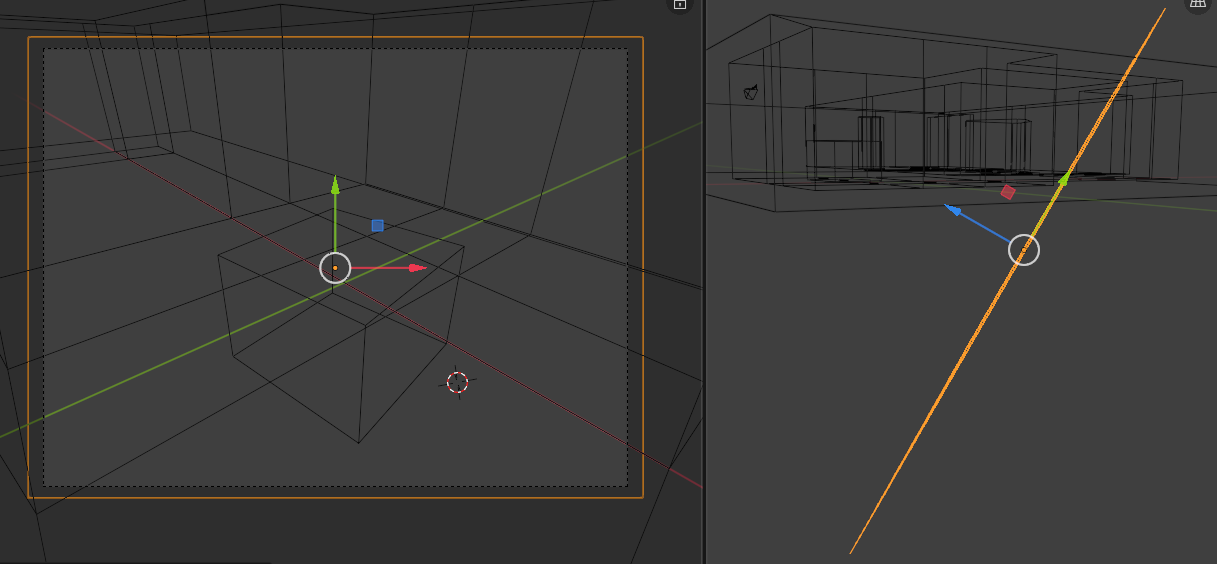
The main background is pretty easy. We need to put a plane behind everything to project our main render into and make it perfectly perpendicular to the camera. We can do this automatically following:
- Create a new plane. Make it the same aspect ratio as the game window.
- Make sure the chosen camera is the active one and switch to its view with Numpad 0.
- Set the transform orientation to “View”
- Orient the plane towards the camera by clicking “Object > Transform > Align to Transform Orientation”
- Without rotating the plane, move it behind the farthest collision mesh point a 3D object could be at that camera angle.
- Switch back to the camera view, and scale and move the plane to completely fill the frame. It’s OK to overfill it, just make sure it’s completely filled.
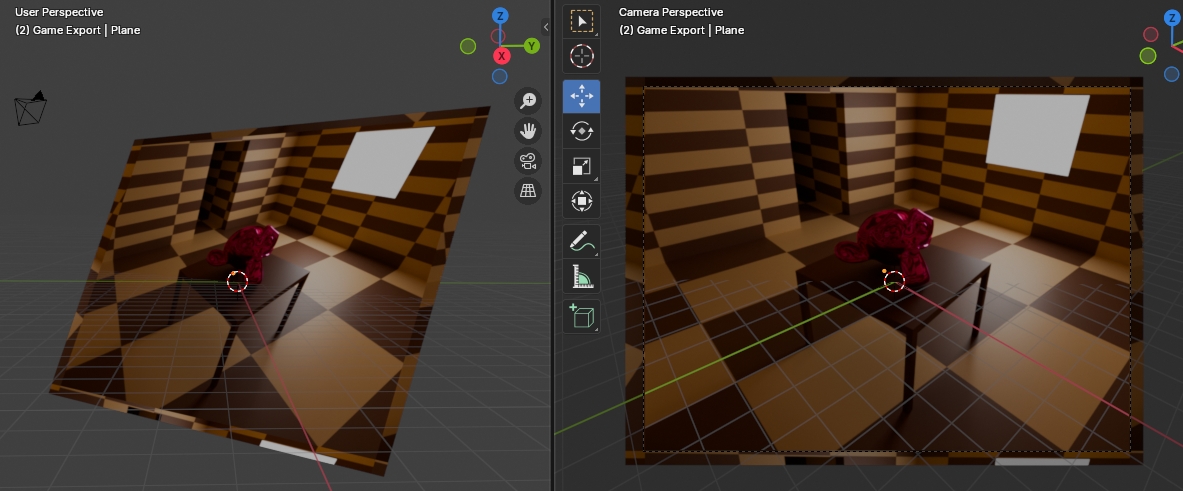
We want to plaster the main render into the plane later. From the camera view, switch to Edit mode, “UV > Project from view”. This will make the render sit exactly where we need it in the plane. Ignore the distortions in the borders. Since they are out of frame, they won’t be noticed in game.
Now we get to the interesting part. We know thanks to the collision mesh where the player (or any object for that matter) won’t be. We can take advantage of that. Since no 3D object will be present inside those areas, we can place planes inside them and project the render to them while ensuring the player won’t clip through it.
Since the projection plane is just another 3D object, it naturally occludes anything behind it, and no more special tricks are needed.
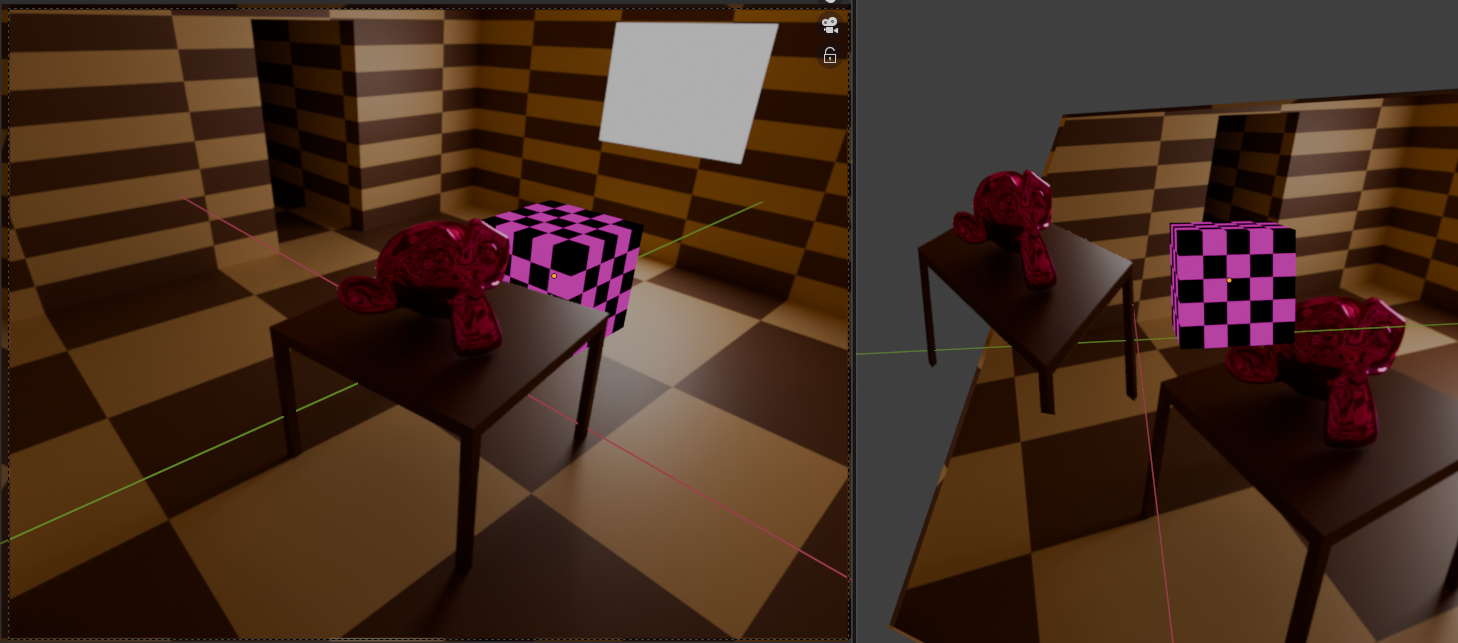
We UV unwrap this plane the same way as we did for the main plane. With this, the cropped render will sit nicely on top of the projection plane and maintaining the illusion it’s not there.
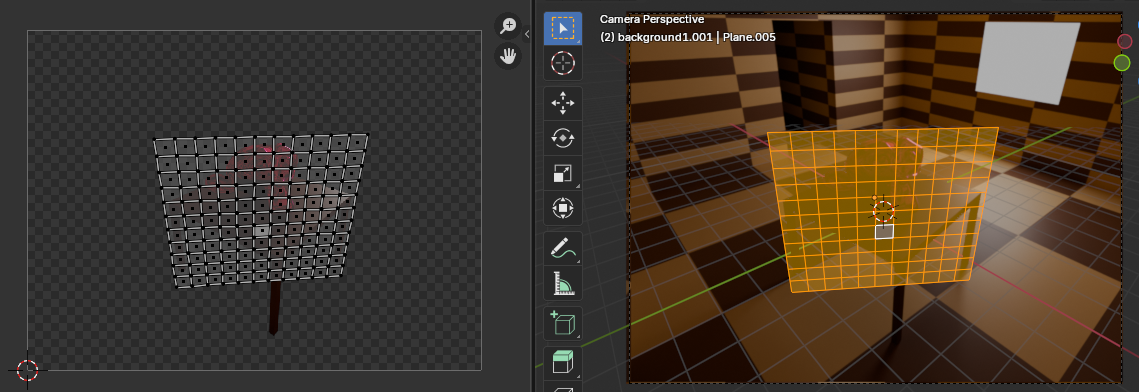
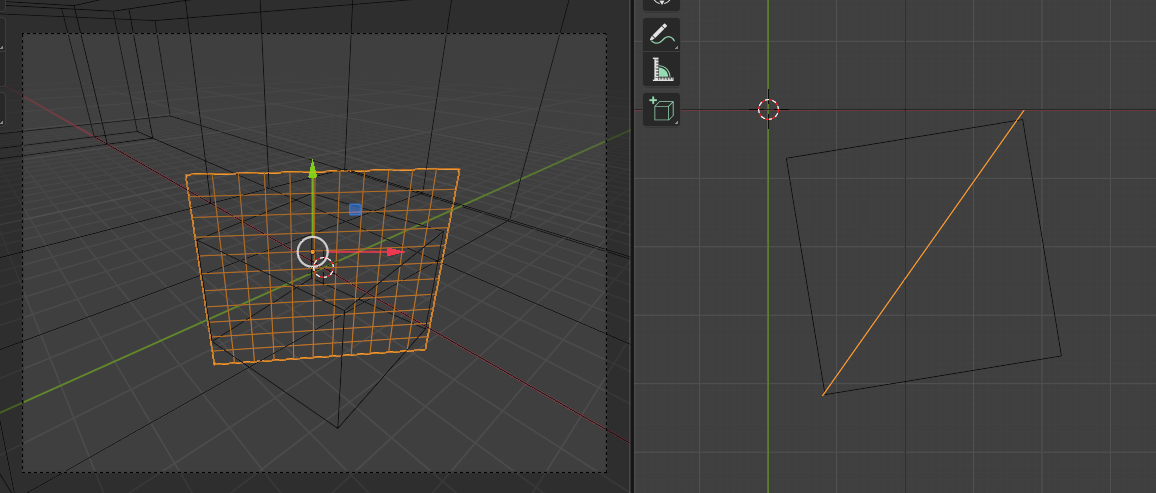
Due to how Blender deals with geometry and UV maps (as far as I understand), if you have only one face for the projection plane the image will distort a lot. This issue will transfer to Godot as well. A solution for this is simply subdivide the plane into more polygons. The more subdivided it is, the less distortion will be present. From my experiments, the irregularity of the shape in the UV map affects the amount of distortion, meaning the sweet spot varies per case.
Materials
We get to actually paint these planes with the renders. We want to show them completely unshaded, with no shadows, lights, reflections; just the renders.
- For the main planes, we need the “Emission” material with a Strength of 1. This way it won’t be affected with external lights sources nor add lighting to the scene. As for the color, just set Image Texture and pick the main render image.

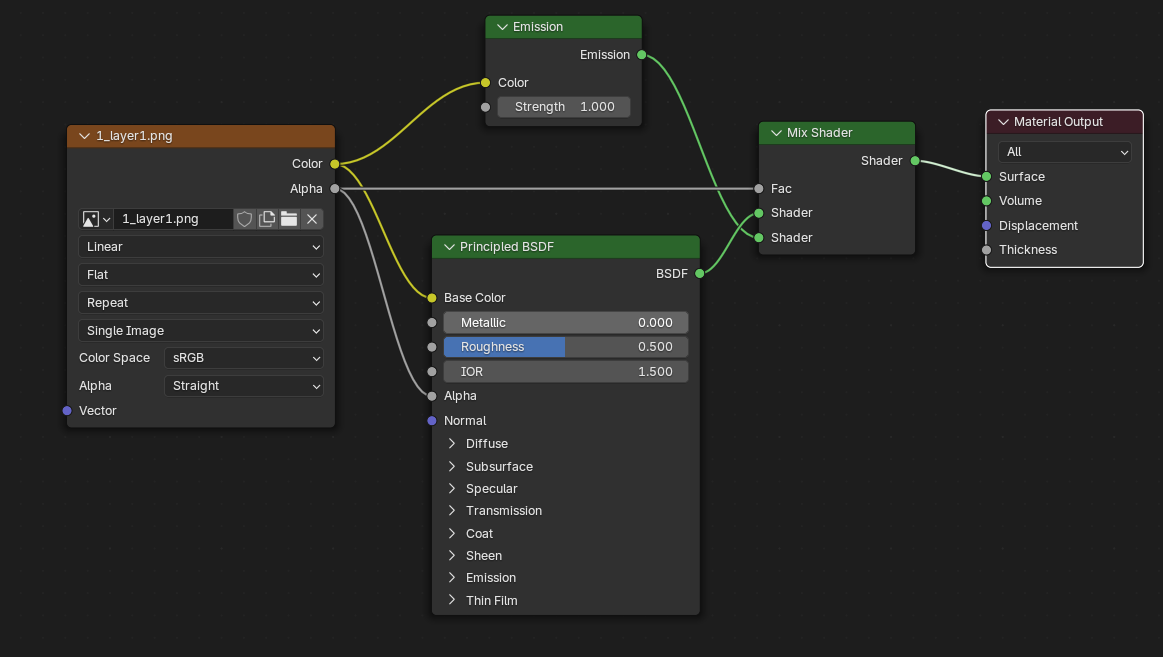
- For the background objects, it’s not as straight forward as there’s a transparent portion of the image. If we just use the plain PNG as before, it will completely fill the transparent portions. We need to keep the emission material in the opaque portions and use a different one in the transparent ones. To do this it’s necessary to use nodes. The following configuration will mix an emission material with some transparency according to the alpha channel of the cropped render:
Wrapping up and getting everything into Godot
Once you’re happy with the result, I recommend joining all the planes into a single mesh, so they will behave as a single object.
You’ll probably want to make more than one angle for your scene. What I did was group the cameras and their respective background in a collection for each.
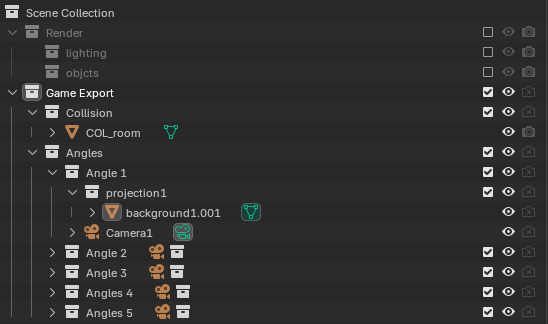
With all of this, we’re ready to get this into Godot. We will export a .gltf package with the cameras and their background, and the collision geometry.
In Godot, we will import the package. This is how it will look. A mess with every plane and collision visible and collisions at the same time.
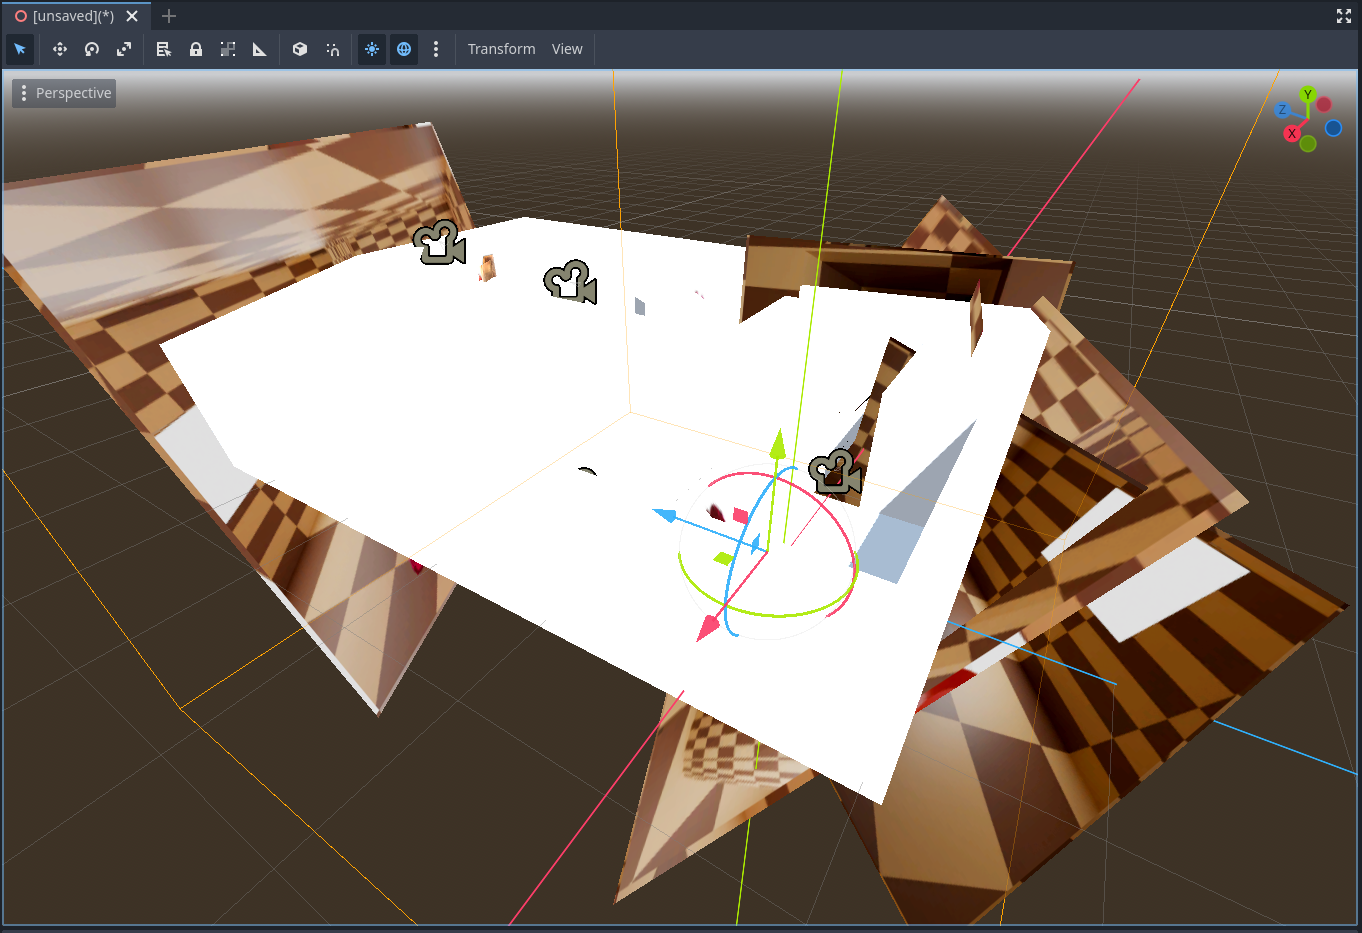
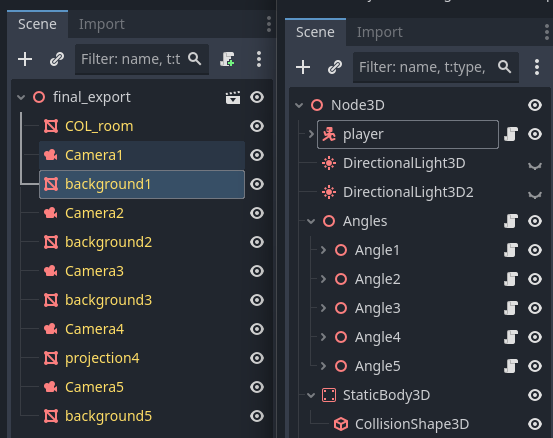
The good thing about the GLTF format is that it the import brings everything exactly as Blender exported them, but we need to organize this a little bit. This won’t be a fully fleshed Godot tutorial because I barely know it, but we want to do the following:
- Separate the camera + projections pairs (from now on: “angles”) to their own 3D node, and add a trigger to each one.
- Make an invisible static body out of the collision mesh
- Add a player with basic movement, and some global directional lighting so it doesn’t look like a floating black bean.
Here’s how I organized the nodes after importing the .gltf file:
Scripts
We need to write two scripts:
- A parent camera controller script attached to the Angles node. On trigger, it will iterate through all its children angles, deactivate all angles but keep only the one that triggered it.
 1extends Node3D
 2
 3# Called when the node enters the scene tree for the first time.
 4func _ready() -> void:
 5	hide_all_angles()
 6	pass # Replace with function body.
 7
 8func set_active_camera(angle: Node3D):
 9	hide_all_angles()
10	if(angle.has_method("activate_camera")):
11		angle.activate_camera()
12
13# Called every frame. 'delta' is the elapsed time since the previous frame.
14func _process(delta: float) -> void:
15	pass
16
17func hide_all_angles() -> void:
18	for angle in get_children(false):
19		if(angle.has_method("disable_camera")):
20			angle.disable_camera()
21 pass- A child single angle script attached to every angle. It will take care of calling the camera controller script as well as changing the visibility of its own objects.
 1extends Node3D
 2
 3@export var player_node_path: NodePath
 4var player: Node = null
 5
 6func _ready():
 7	player = get_node(player_node_path)
 8
 9func _on_trigger_area_entered(area: Area3D) -> void:
10	pass # Replace with function body.
11
12func _on_trigger_body_entered(body: Node3D) -> void:
13	print(body)
14	if body == player:
15		var angles = get_parent()
16		if angles.has_method("set_active_camera"):
17			angles.set_active_camera(self)
18	pass # Replace with function body.
19
20func activate_camera():
21	$Camera.current = true
22	$background.visible = true
23	pass
24
25func disable_camera():
26	$Camera.current = false
27	$background.visible = false
28	pass
If everything went right, the game should switch seamlessly between angles.
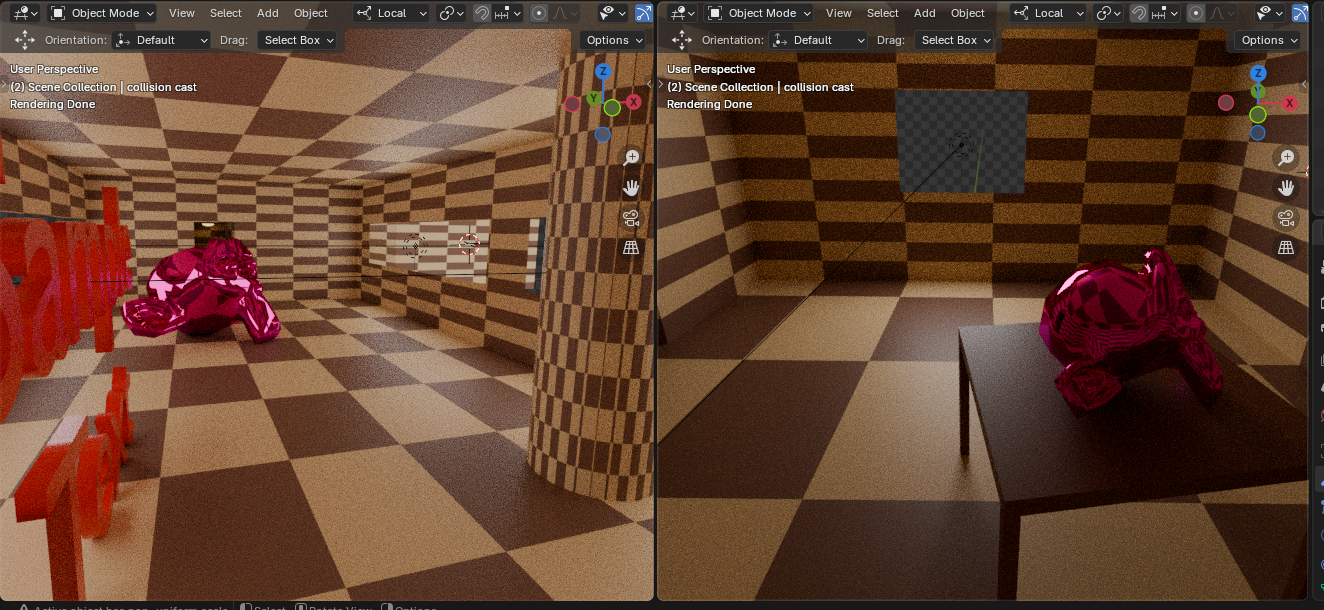
We can see how it works behind cameras here:
Some limitations
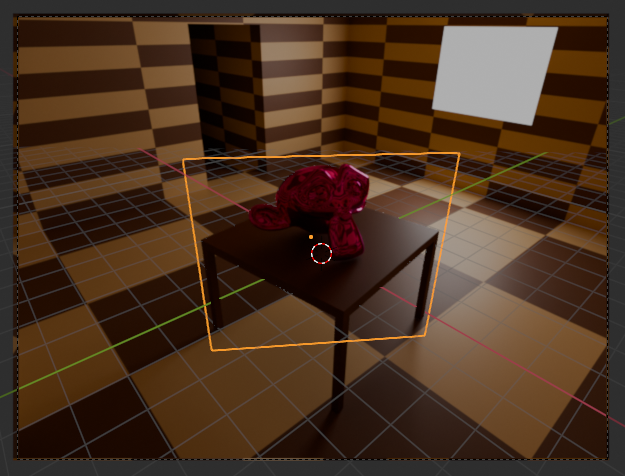
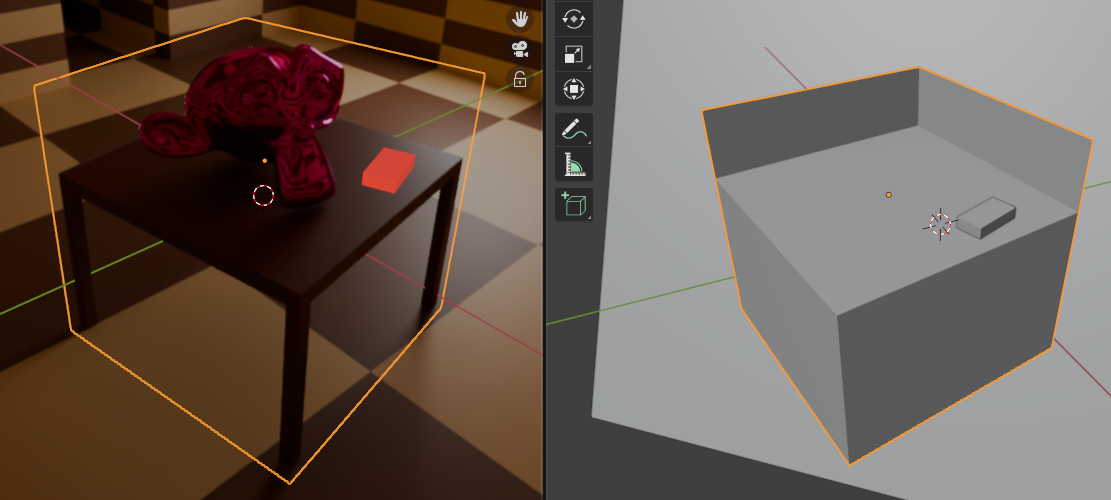
This approach works fine for situations there’s not much vertical sense (like for example Doom, which is essentially a 2D game with a 3D viewport). If, for example, you want to add a table where you can place a pickable ammo box on any part of its surface, the box could be obscured by the projection plane.
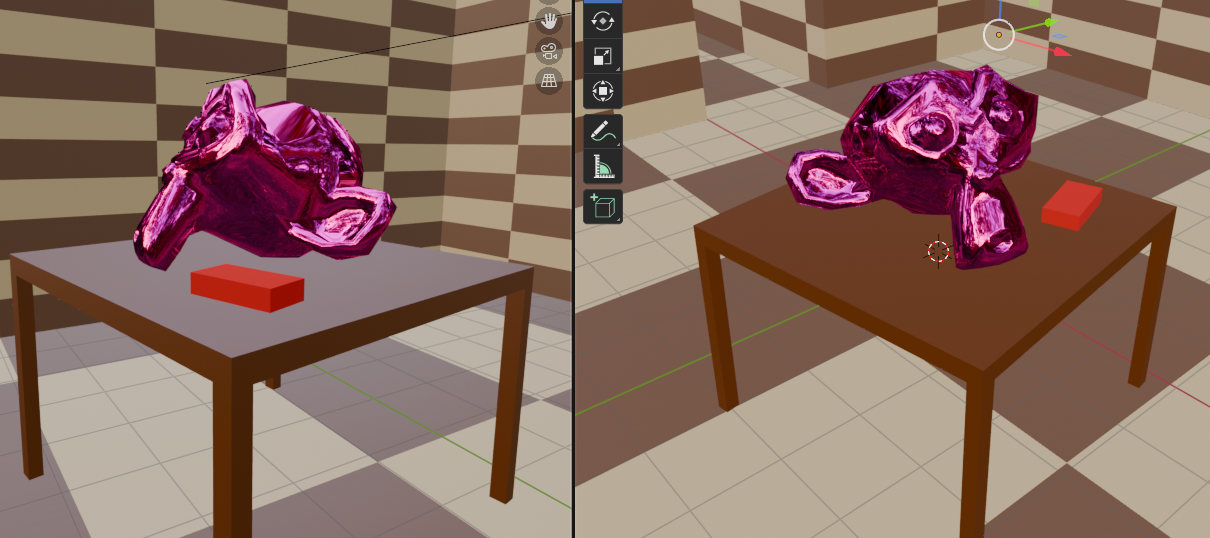

A possible solution is to add more planes, including a horizontal one, but not a single vertical plane for the whole object like it was shown. The more complex the background object is, the more projection planes you might need. There’s not one catch-all solution and it will vary depending on the situation. Below you can see a quick and dirty shape I made to solve this particular situation, but there’s probably a more efficient shape less prone to distortions. This shape allows to place an object at any point of the table, regardless of any prerendered objects on top of it.
Conclusion
That’s pretty much about it. I don’t have plans to expand it into a complete product for now, but I do have some ideas. I had a lot of fun doing this project that’s been in my head for years. If you want to research more into it, I dropped both the Godot and Blender projects to a GitHub repo. Feel free to grab it and do whatever you want with it. If you do end up making something with it, I would like to see it. Link below.
Some links
GitHub repo. As previously mentioned, everything here is freely accessible. They were made with Godot 4.4.1 Stable and Blender 4.5.1 LTS.
Justin Meiners - An Adventure in Pre-Rendered Backgrounds. Huge inspiration for this post and some of my early attempts. Did not take much from it for this project but worth mentioning.
FinePointCGI - Creating A PS1 Resident Evil Prerender System In Godot. Gave me a big boost to start my Godot attempt. Here I found out about .gltf files and it changed everything.